How to Register For Classes
Whether it's Fall, Spring, or Summer, enrolling in classes is easy with the iRattler Schedule Builder!

Register For Classes
Follow the Steps Below to Register For Classes!
1. Log in to your iRattler ➜ Click iRattler Campus Solutions ➜ Click "My Academic Requirements."


2. Your academic requirements page will display several boxes with green header bars.
These sections represent the courses/requirements for your major. Toggle these sections
open by clicking on the green bars or the "Expand All" button.
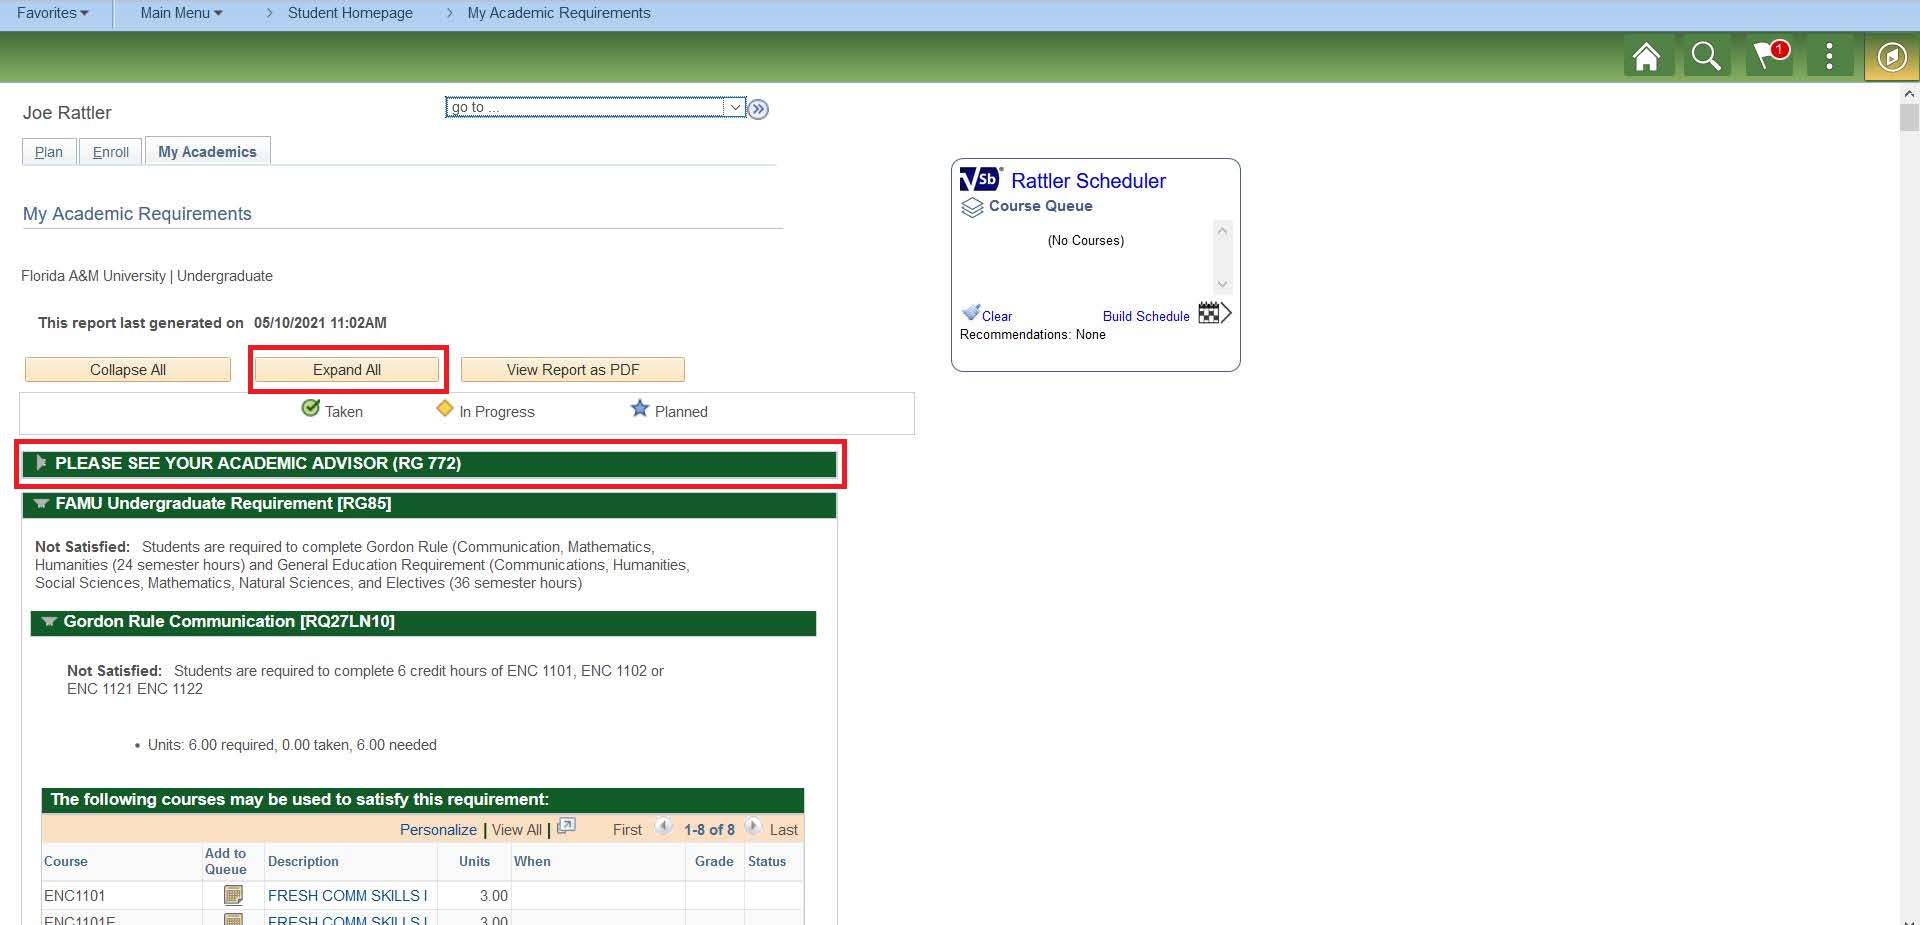
2 (cont). Under the green requirement headers, you will see the list of course options to choose from that will satisfy that particular requirement.
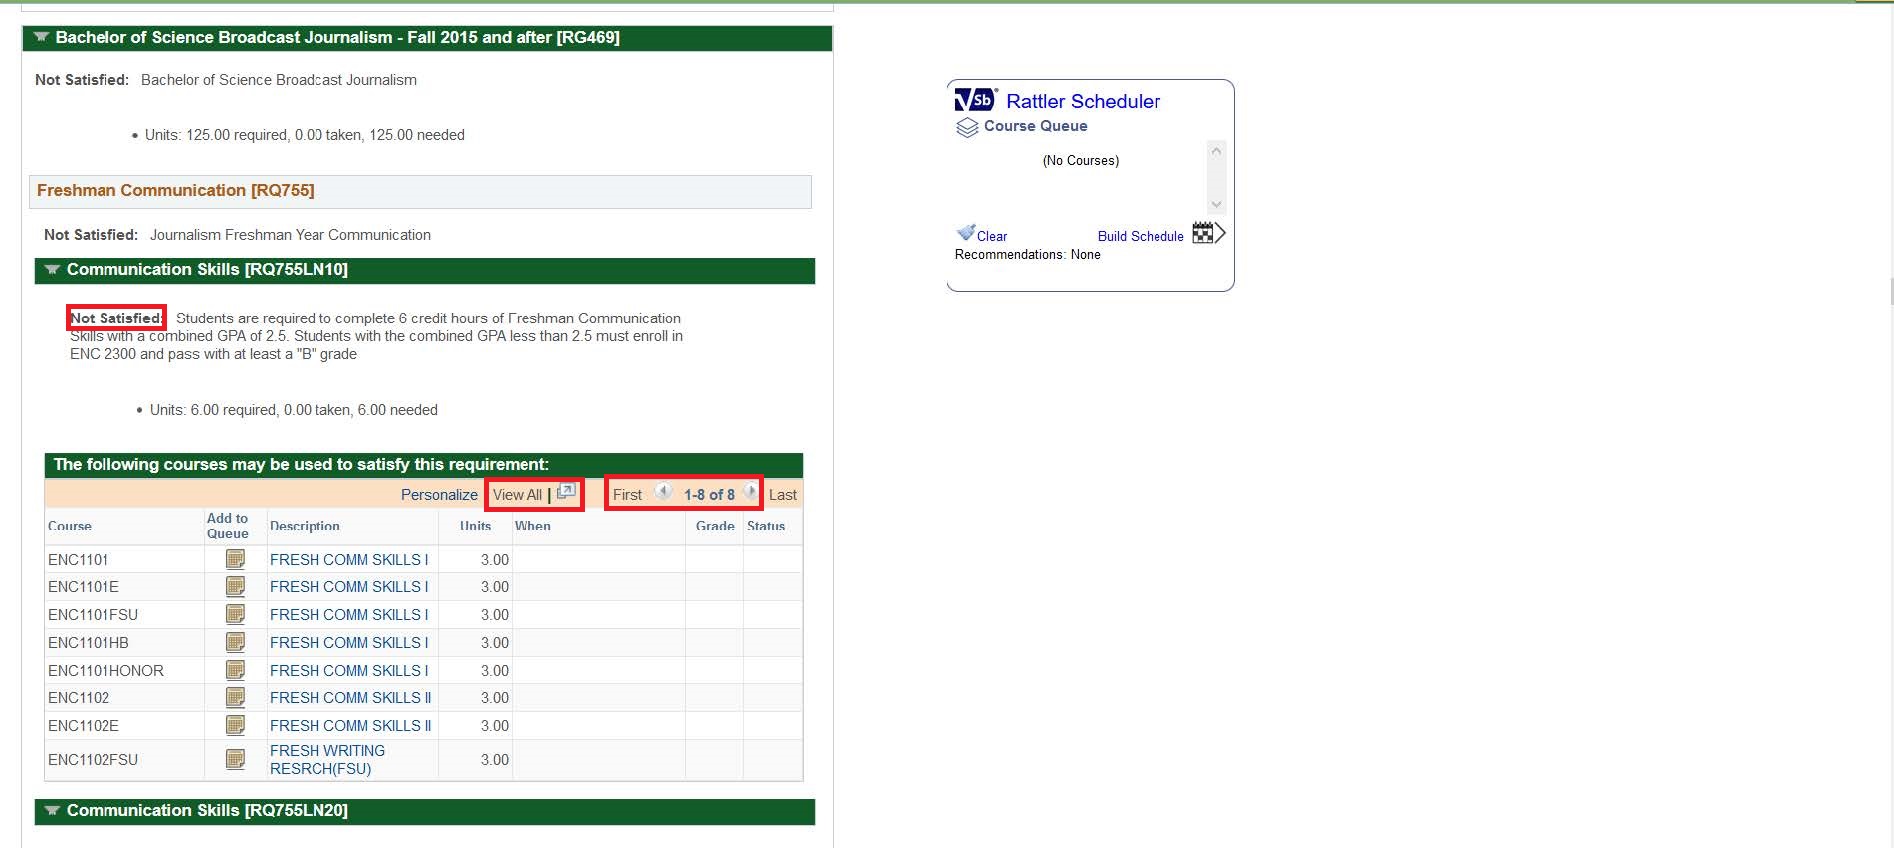
- Requirements that have not been satisfied will display “not satisfied.”
- Be sure to click "view all" to see all possible course options.
- By clicking the text in the "Description" column, you can VIEW the course details, but you CANNOT add them to your cart here.
3. Once you have decided on the course you want to take under that section ➜ Click the yellow "Add to Queue" icon for that course.
Do this for all of the classes you want to take this semester.
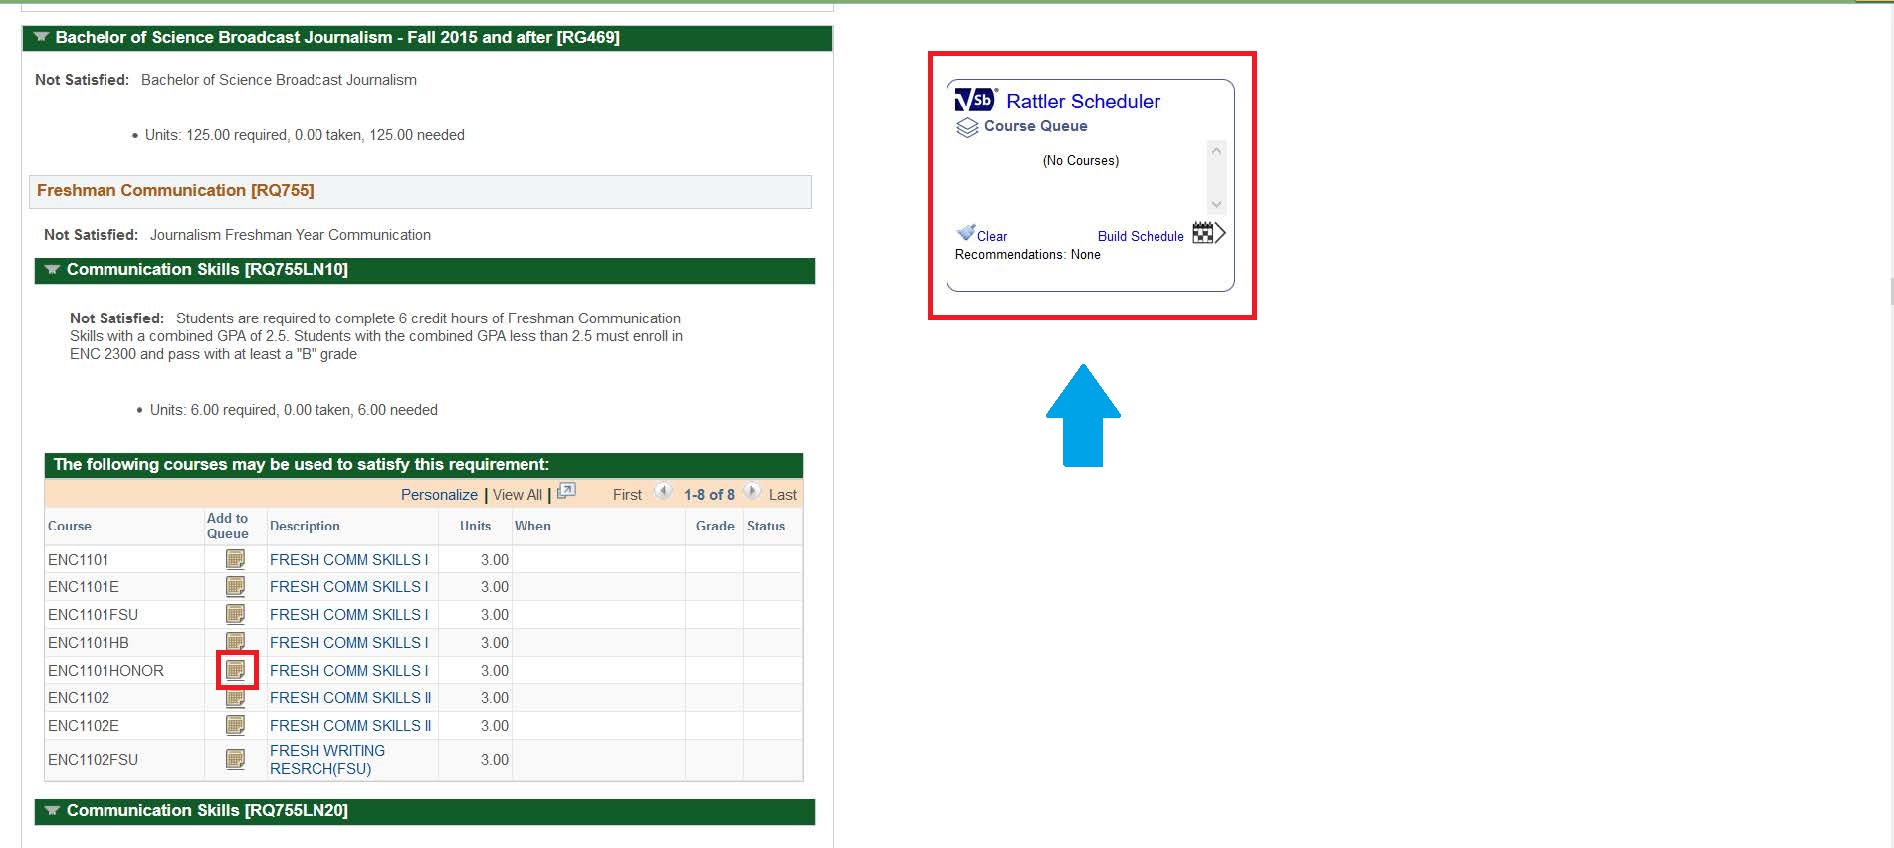
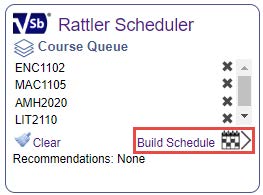
4. As you select your courses with the yellow "Add to Queue" icon, you will see the
courses you have chosen appear in the "Rattler Scheduler" box located on the side
of the page.
Once you have chosen all your courses ➜ Click "Build Schedule." This will take you to the "Schedule Builder."
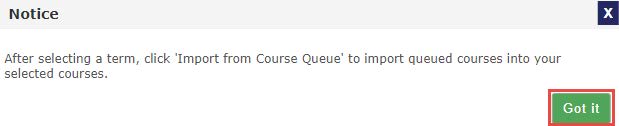
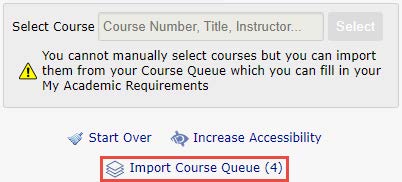
5. After you enter the "Scheduler Builder" ➜ review the notice and select "Got It" ➜ Select the appropriate term ➜ Select the "Import Course Queue" link.

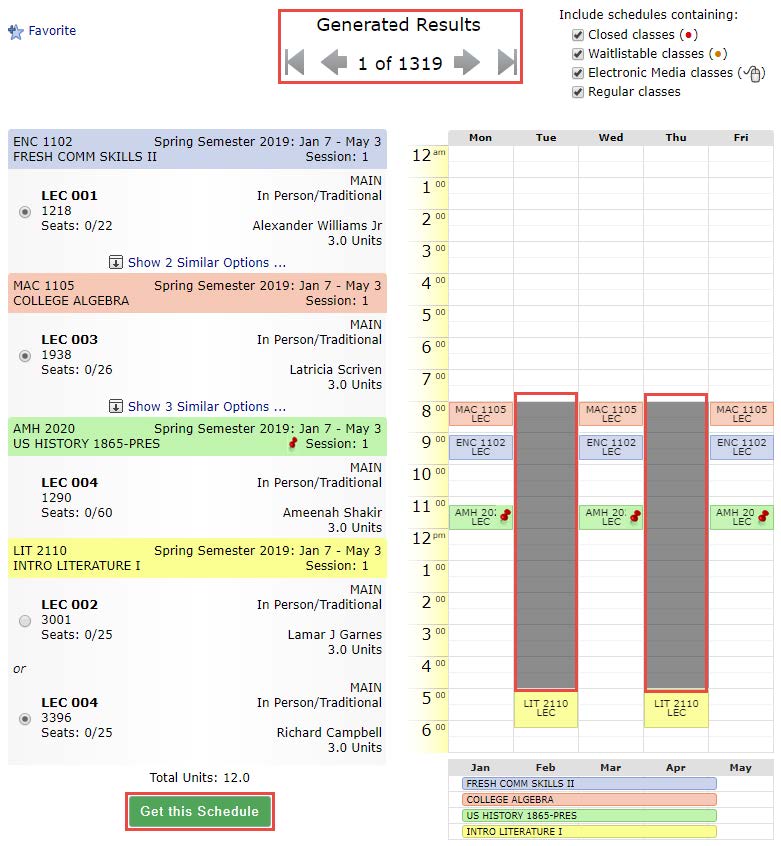
6. Here is where you can choose the appropriate schedule based on personal time obligations
(e.g. practice or work), sort preferences, or recommendations per your Academic Advisor.
- You can "gray out" blocks of time that you don't want to have classes. The Schedule builder will adjust accordingly.
- You can pin down a course that you desire by simply clicking the specific course on the timetable.
- "Generated Results" shows you the number of possible combinations of class sections and times. This number will decrease the more classes are pinned.
7. Continue to build your schedule until all your courses are represented/pinned on
the "Schedule Builder."
Once you have all your classes pinned on the Schedule Builder ➜ Select the green "Get this Schedule" button.
8. In the "Action Column" Use the drop-down function to change all the options to
"Enroll."
When required, enter the permission number in the following box. ➜ Select the green "Do Actions" button.
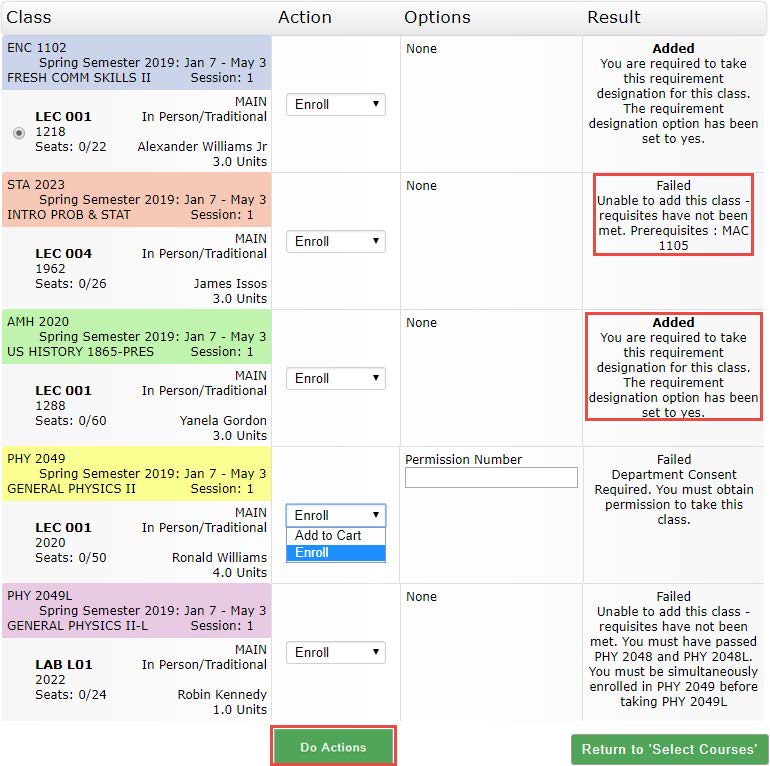
8 (cont). In the "Results Column" it will indicate if the course was added or if it
"failed" due to a specific error.
NOTE: Some classes cannot be added until you have completed the prerequisites. Some
classes require a permission number.
IF YOU RECEIVED THE "FAILED INDICATION" MESSAGE, use the "Actions Column" drop-down
function to change that course to the option "Add to cart." This will save the class
in your cart so you can return later and enroll once you have been graded for the
prerequisite course or have obtained a permission number.
9. To be sure you are properly enrolled in your courses, return to your "Student Center."
Your currently enrolled courses will be displayed at the top. If you do not see a class, that means you did not complete the enrollment process for that class.

Done! Enjoy Your Semester!
For additional assistance, please contact the Registrars Office at (850) 599-3115 or registrar@famu.edu